SharePoint Project Items, or SPIs, are a key ingredient to any SharePoint solution created with Visual Studio. They are templates of reusable components that can be easily added to your SharePoint project to add specific functionality. Even more than that, they ultimately become the element manifests of the feature definitions that make up your SharePoint Solution Package. Learning the capabilities and purposes of these items is important to creating a streamlined and maintainable solution for your SharePoint environment.
SPIs
Let’s take a closer look behind the scenes of a SharePoint Project Item. First, we can create a sample SharePoint project to work with. Open Visual Studio and create a new empty SharePoint project. You can call it whatever you like. Mine is called SharePointProject1.
Right-click the project folder from the Solution Explorer and choose “Add,” then “New item.” Next, select the SharePoint group. All of the items you see here are SharePoint Project Item templates. Each of these items can help us easily create a certain type of element or artifact for our SharePoint project and let us customize them as necessary.
Choose to create a new Visual Web Part by selecting that item, giving it a name, and then clicking “Add.” Visual Studio will now create a new SPI for our Visual Web Part in our project.
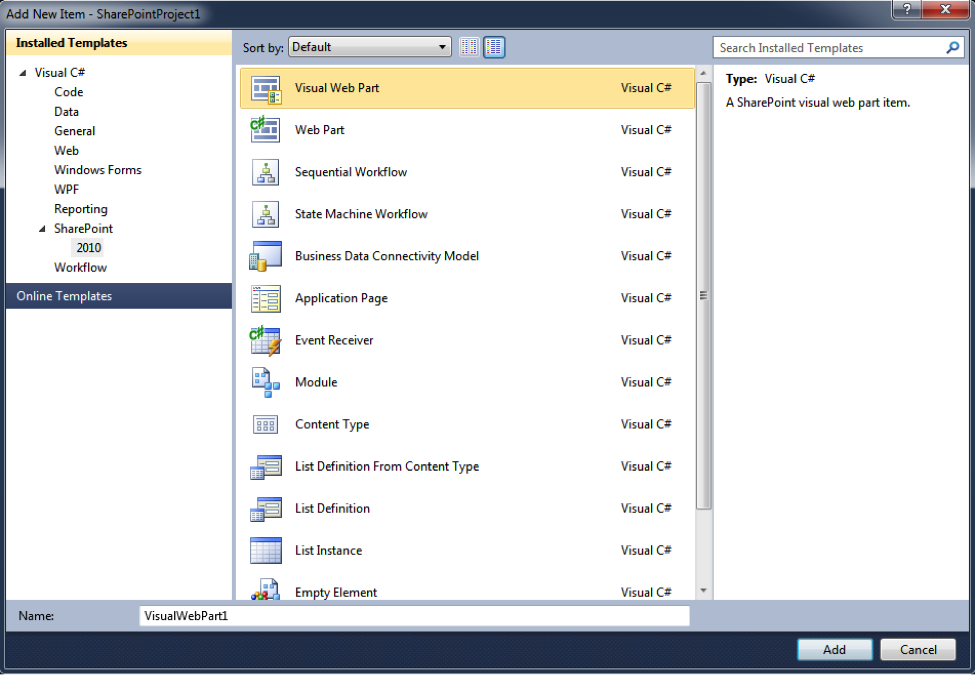
Figure 1
Next, if we look at the Solution Explorer, we’ll see that we now have a feature to deploy our item, called Feature1. Click on the VisualWebPart1 that we created in Solution Explorer and make sure that the item is expanded. You can see that the SPI looks just like a folder and contains several items.
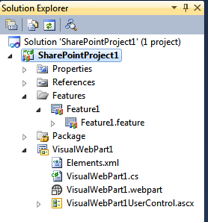
Notice that the first file is the “elements.xml” file, which contains the elements manifest for the SharePoint Item. Our SPI was automatically added to Feature1 for us. This will deploy the artifacts in our SPI when this feature is installed and/or activated to the farm. We could have chosen to include it in a different feature or a pre-existing feature by adding it from that feature’s Feature Designer page.
#!
SPI Configuration
SPIs provide us with good encapsulation of functional elements and give structure to our project. They also provide the ability to customize the deployment of our items.
Feature manifests are often deployed with properties defined in them that provide customization and reusability for the feature. SPIs have a Feature Properties collection associated with them that allows us to define feature properties specific to our item. Those properties are brought along and added to the feature manifest of any feature where we choose to include in our SPI.

Solution manifests are responsible for declaring where artifacts are deployed in the SharePoint farm. Each item within our SPI has a property called “Deployment Type” and “Deployment Location.” These can be used to tell our solution where we want our artifacts deployed. As an example, right-click on VisualWebPart1UserControl.ascx and choose properties. The Deployment Type is set to “TemplateFile” and the Location is “{SharePointRoot}TemplateCONTROLTEMPLATESSharePointProject1VisualWebPart1”. We could have just added a “CONTROLTEMPLATES” mapped folder to our project, but this provides a nice way to keep all of our related artifacts together for our SPI. The result is an entry in our solution manifest that looks like Figure 4.

Figure 4
To learn more about SPIs and to see a full listing, visit msdn.microsoft.com/en-us/library/ee231554.aspx.
Phil Jirsa is a SharePoint developer at SharePoint911, a Rackspace company.